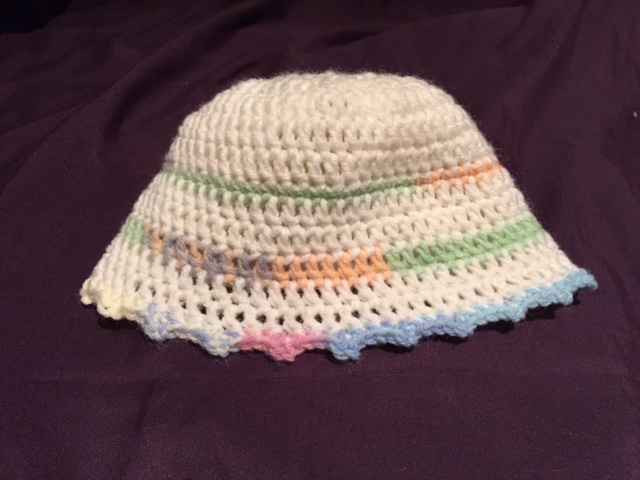
As promised, I have written up the instructions for making the little newborn hat that I made for my friend’s baby from the scraps left over from the baby blanket I made for her. The yarn I used was Sirdar Snuggly DK in cream and one of the Snuggly ‘Crofter’ colourways. Any super soft baby yarn will do and you only need small amounts. I used a 4mm hook.
UK crochet terms are used throughout.
Row 1. Using the main colour yarn (in this case cream) make an adjustable loop, chain 3 (counts as 1TB here and elsewhere in the pattern) and then 11TB into centre of loop. Slip stitch into top of Ch3. Pull tail to close the loop. (12 stitches)

Row 2. Chain 3, TB, then *TB between the stitch you have just trebled into and the next one along, then TB into that next stitch**. Repeat from * to ** 10 more times so that you have 24 stitches (including the Ch3), and then slip stitch into the top of the Ch3 to close the circle.

Row 3. Chain 3, TB, then TB between the stitch you have just trebled into and the next one along. *2TB, then TB between the last stitch you have just trebled into and the next one along**. Repeat from * to ** to the end of the circle so that you have 36 stitches (including the Ch3), and then slip stitch into the top of the Ch3 to close the circle.

Row 4. Chain 3, 2TB, then TB between the stitch you have just trebled into and the next one along. *3TB, then TB between the last stitch you have just trebled into and the next one along**. Repeat from * to ** to the end of the circle so that you have 48 stitches (including the Ch3), and then slip stitch into the top of the Ch3 to close the circle.
Row 5. Chain 3, 3TB, then TB between the stitch you have just trebled into and the next one along. *4TB, then TB between the last stitch you have just trebled into and the next one along**. Repeat from * to ** to the end of the circle so that you have 60 stitches (including the Ch3), and then slip stitch into the top of the Ch3 to close the circle.
These five rows (rounds) form the top of the hat. We next start to shape the sides.
Row 6. Chain 3, then 59 TB. Slip stitch into the top of the Ch3 to close the circle.
Row 7. Repeat Row 6.

Row 8. Change to contrast colour. Chain 1 and 60DC. Slip stitch into the first DC to close the circle.
Row 9. Change to main colour. Repeat Row 6.
Row 10. Repeat Row 6.

Row 11. Change to contrast colour. Repeat Row 6.
Row 12. Change to main colour. Repeat Row 6.
Row 13. Repeat Row 6.
Now onto the final row, which gives the picot edging.
Row 14. Change to contrast colour. Chain 1. *2 DC, (DC, Ch2, DC) into next stitch**. Repeat from * to ** all the way around. Slip stitch into the first DC to close the circle.
Sew in ends.
To make the hat bigger, carry on increasing the size of the circle by 12 stitches each round, following the pattern indicated by the first five rows. Then when the crown is large enough, carry on with extending the sides to the desired length by TB into each stitch around without increasing, again, following the pattern set above, before finishing with the picot row.
