New Year’s Intentions

Ok, so I don’t really have the resolve for resolutions, but I do have lots of honest intentions.

  1.  Once the January Sales are done, no more yarn buying for the rest of the year.
  2. Reduce the stash by at least 50%.

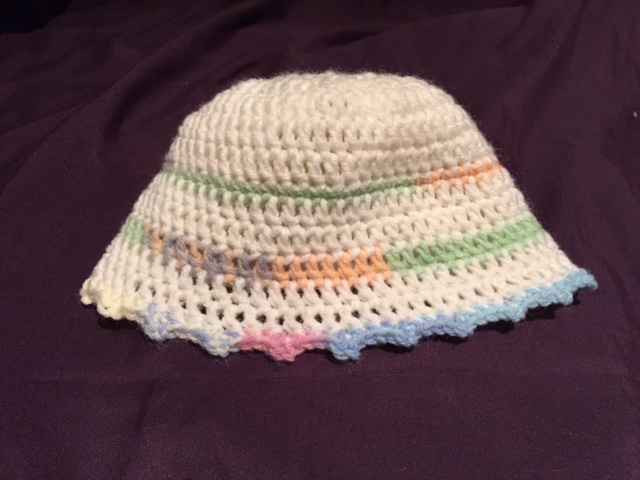
Yes, that is right, I am going on complete stash lockdown at the end of this month and the plan is to see if I can truly stashbust.  I have a plan to knit lots of socks, both for me and for presents, and I have recently discovered the joy of knitting hats with Aran wool (so fast, and I can get two hats out of a single skein which is a bonus).  Exhibit A – the hat I knitted in a few hours one evening, using Dye Candy yarn and a pattern from the Toft Quarterly Magazine.

img_1743

I also need to help to raise funds for my daughter’s school, so lots of making is required there.  That will give me the chance to clear out all my acrylic yarn too, so that will be satisfying to see that go down.

3.  Blog more frequently and more regularly.

This year work has got in the way. I have been too tired to think in the evening, let alone type.  This is going to change.  My working pattern has to change in pretty fundamental ways because how I am working right now is not sustainable.  And I feel that I keep losing momentum every time work pulls me away from this part of what I do.  To achieve this I have to start taking better care of myself.  That one is easier said than done, but tonight I am going with an early bath, blog and then some knitting to motivate myself a bit.  If I can get two or three blogs out during the week, with a longer one at the weekend I think that might be good.  Perhaps introduce some features.  One of my friends has voted for ‘Squish of the Week’ – a random delve into my stash to show off different yarn types and dyers.

4.  Write more patterns.

Ok, so Shawl Club is going into Season 2 in March, but I feel the need to do a wider range of patterns than just shawls.  A mixture of quick makes and more extended projects.  I might even venture into one or two knitting patterns if I am feeling very brave, but that might be a step too far for me.

5. Do a yarn show.

Ok, so this one terrifies me.  Sue talked me into this one.  At the moment I don’t know which show, and it will probably only be one day, and I need to do my sums properly re how to make it work for me.  I love the idea of it, I am just worried that it might be a bit too soon for me, and there would be a huge amount of work required to get my stall elements ready in time. So I am not sure if I can pull this one off, but I am certainly going to look seriously at it.  I just need to sit here and feel a bit sick at the thought of it for a while.

6. Do a book.

Now, I write for a living, so the idea of writing a book doesn’t daunt me, but I haven’t self- produced the whole thing before, so that would be the challenge.  I have two book concepts in my head – one requires more work than the other – but I think I could get the book thing to work with a bit of peer support and some planned leave from work.

So there you go – six of the best.  Let’s see how many I can tick off.  Can I do it?  Should I do it?  Hmm. Let’s see…

Advertisement

Newborn ‘Scraps’ Hat

As promised, I have written up the instructions for making the little newborn hat that I made for my friend’s baby from the scraps left over from the baby blanket I made for her.  The yarn I used was Sirdar Snuggly DK in cream and one of the Snuggly ‘Crofter’ colourways.  Any super soft baby yarn will do and you only need small amounts. I used a 4mm hook.

IMG_0847

UK crochet terms are used throughout.

Row 1. Using the main colour yarn (in this case cream) make an adjustable loop, chain 3 (counts as 1TB here and elsewhere in the pattern) and then 11TB into centre of loop.  Slip stitch into top of Ch3.  Pull tail to close the loop. (12 stitches)

IMG_0828

Row 2. Chain 3, TB, then *TB between the stitch you have just trebled into and the next one along, then TB into that next stitch**.  Repeat from * to ** 10 more times so that you have 24 stitches (including the Ch3), and then slip stitch into the top of the Ch3 to close the circle.

IMG_0829

Row 3. Chain 3, TB, then TB between the stitch you have just trebled into and the next one along. *2TB, then TB between the last stitch you have just trebled into and the next one along**.  Repeat from * to ** to the end of the circle so that you have 36 stitches (including the Ch3), and then slip stitch into the top of the Ch3 to close the circle.

IMG_0831

Row 4. Chain 3, 2TB, then TB between the stitch you have just trebled into and the next one along. *3TB, then TB between the last stitch you have just trebled into and the next one along**.  Repeat from * to ** to the end of the circle so that you have 48 stitches (including the Ch3), and then slip stitch into the top of the Ch3 to close the circle.

Row 5. Chain 3, 3TB, then TB between the stitch you have just trebled into and the next one along. *4TB, then TB between the last stitch you have just trebled into and the next one along**.  Repeat from * to ** to the end of the circle so that you have 60 stitches (including the Ch3), and then slip stitch into the top of the Ch3 to close the circle.


These five rows (rounds) form the top of the hat.  We next start to shape the sides.

Row 6. Chain 3, then 59 TB. Slip stitch into the top of the Ch3 to close the circle.

Row 7. Repeat Row 6.

IMG_0845

Row 8.  Change to contrast colour. Chain 1 and 60DC. Slip stitch into the first DC to close the circle.

Row 9. Change to main colour. Repeat Row 6.

Row 10. Repeat Row 6.

IMG_0846

Row 11. Change to contrast colour.  Repeat Row 6.

Row 12. Change to main colour. Repeat Row 6.

Row 13. Repeat Row 6.

Now onto the final row, which gives the picot edging.

Row 14.  Change to contrast colour. Chain 1. *2 DC, (DC, Ch2, DC) into next stitch**. Repeat from * to ** all the way around.  Slip stitch into the first DC to close the circle.

Sew in ends.

IMG_0847

To make the hat bigger, carry on increasing the size of the circle by 12 stitches each round, following the pattern indicated by the first five rows.  Then when the crown is large enough, carry on with extending the sides to the desired length by TB into each stitch around without increasing, again, following the pattern set above, before finishing with the picot row.